Sutter Sugar of The Sugar Team recently set down with the Owner/Operator of Professional Radon and Sewer Scoping Services Caleb Koke to talk about in-floor ducts, duct problems and their remedies in homes.
Caleb’s company has over four years of experience in this line of work. A sharp entrepreneur all on his own, he has owned multiple businesses and decided to go into a line of work with a strong need for professional inspections and top-notch remedies. We had the opportunity to probe (pun intended) into this integral component of the housing industry.
The Sugar Team: Based on your experience, when do you think a home should have a duct inspection?
Professional Radon and Sewer Scoping Services: As soon as possible. As soon as you know you have in-slab ducts I would recommend you do a duct inspection.
ST: How do you do a duct inspection?
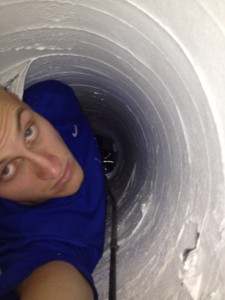
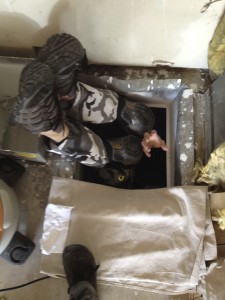
PRSS: The only way is with a visual camera inspection. It is a fiber-optic camera. We have the best equipment on the market. It’s a self-leveling, color, full, high-definition picture camera. It gives you the best imagery that you can get from a remote distance. Because the ducts are in a location that’s inaccessible, you have to have some sort of a camera. All of our cameras are 200 feet, so you can really get in wherever you need to, permitting the system allows us. Different configurations don’t let us get to everything, but our intention for the inspection is to see the duct system as best as we can to get the best picture of what we can see. Imagine a flexible push-rod with a camera attached at the end. The inspector removes all the duct registers and then feeds the camera through. There’s a pattern where the inspector’s taking notes as he’s going through the inspection to accurately represent the system. However, there’s a common misconception with good airflow. Just because you have air flow doesn’t guarantee that a duct is in good condition. There have been ducts that we have gone into that could be completely rusted, collapsed in one area, full of dirt, but there’s still some air getting through. You would assume everything’s fine, but you have no idea until you actually see it.
ST: What does a duct inspection cost?
PRSS: We charge $179 for a duct inspection all by itself. We also offer a combo-package, where we can inspect both the in-floor ducts and the sewer line.
ST: I’d imagine upon reviewing the duct inspections you see a lot of funny things… What are some of the strangest things you’ve found inside of a duct?
PRSS: We have found anything from drugs to toy cars. Mostly we find toys, because little kids will drop or put their toys into the registers. One time we found a remote-controlled car with a string tied to it that got just out of reach of the little kid to see how far he could drive it into the duct.
ST: That’s funny! I have a funny anecdote about the home my wife and I bought. We had a duct inspection done as well. I’m from the US and my wife is Venezuelan. Inside the duct they found one shiny quarter side-by-side with a Bolivar, the currency from Venezuela. What are the chances!? It was impossible for my wife and I not to think it was fate that we should buy our home.
ST: Now, what is the problem with in-floor ducts? What is the cause of these problems?
PRSS: It has to do with how the duct was actually built. That’s what causes them to have problems: the installation of the duct. It’s not particular to certain geographical areas. We’ve inspected different homes in the same subdivision, side-by-side, with the same builder, but different subcontractors. With one home the duct system was done right. With the other home the duct system was done wrong. It was how it was built. One had the duct system completely encased in concrete, and the other one didn’t. It goes back to the subcontractor. Who installed it? It could be the same person doing the installation in High Desert or Four Hills or Rio Rancho, and if they were doing it wrong, they were doing it wrong. You’re going to have the same issues in all three of those homes in terms of who did it and why they did it wrong. That said, we’ve seen neighborhoods that predominately have in-slab ducts during certain time periods. Like Tanoan or homes in the Academy Corridor. These are areas that used in-slab ducts during certain periods of time, and we still see in-slab ducts being built now. High Desert is one of the newer developments here in Albuquerque where there are in-slab ducts and we’ve seen issues for in-slab ducts in homes only 10-15 years old just like 30-40 year old homes in Tanoan.
ST: So, if one duct system is not fully encased in concrete, what is it encased in?
PRSS: It’s going to be partially encased in concrete. There are pockets where this is the situation. We have done inspections in the Valley and Big Sky and other places where the ducts were just encased in dirt or soil. There was no concrete…anywhere!
ST: In other words, if the duct system is completely encased in concrete, like it should be, there won’t be a problem?
PRSS: 99% of the time there won’t be a problem.
ST: So, when you have dirt touching the duct that can be a problem?
PRSS: When you have a duct–whether it’s Sonotube or galvanized metal–that has contact with soil, that exposes the duct to potential moisture. Now, the soil itself probably has a little bit of moisture, but if the soil absorbs any moisture–whether if it’s from rain fall or irrigation (landscaping), lawns, the soil’s going to absorb the moisture and once that comes into contact with the duct that can start the deterioration process with Sonotube or the rusting process in the case with galvanized. Once you have rust that penetrated through the galvanized coating, it’s just oxidation and it’s just going to continue on its own. Unless you do something to block it or reinforce it or stop it by applying Duct Armor™—that’s our special coating—it could continue rusting until it rusts through. If the duct is completely rusted through and has lost all shape then you have no choice, but to rip into the floor or install new ducts over-head. So, there’s an opportune time to restore them where we can coat them and restore them if we can still salvage the shape of that duct. This is the case if it still has shape, because when Duct Armor™ hardens it really, really hardens. That’s a big difference between our product and some of the other products in the marketplace. If you look at the marketplace there are two different products. They have a base-primer and they have a white top-coat. If you were to see any of them in real life you would notice a big difference between the products that we use—with which we have an exclusive license in the state of New Mexico—and what else out there that is being used. We can coat it and provide a protective layer without breaking up the floor.
ST: What is Sonotubing?
PRSS: It’s a reinforced cardboard with a mylar coating.
ST: You can coat Sonotubing with your product to reinforce it?
PRSS: Absolutely!
ST: What is the range of problems you’ve seen with in-slab ducts?
PRSS: At the beginning of the spectrum we may see basic minor deterioration. Using Sonotubing as an example, we see basic deterioration where it’s just aging and the actual shape of the duct (or tube) is in good condition, but maybe the silver coating (the mylar coating) has lost its adhesion. It’s forty years old and the glue’s losing it and it’s peeling off. The actual shape of the duct is good. This takes a trained eye and this is what we look for in our inspections, especially when we’re doing estimates, because it seemed to the untrained eye that it looks totally fine, and it’s not or vice versa. The mylar coating might be coming off, but the duct is actually okay. It’s just aesthetic; it’s just topical. There may be a minor case where the mylar coating is peeling, or maybe there may be some dust or specs–like in galvanized which is just aesthetic–but in the worst case you may find a duct completely collapsed and full of dirt. It’s completely rusted through and caved in. This is because it wasn’t properly encased. We’ve been in homes where we’ve pulled out hundreds and hundreds of gallons of dirt out of the ducts.
ST: In that range you’re talking about, what would be the cure for the duct where the mylar coating is peeling off and the duct maintains its shape versus a completely collapsed duct?
PRSS: We have a scale for everything leading up to the point of needing restoration. First, we recommend basic monitoring. If it were just minor peeling or little things like that, we would not recommend doing anything. On the other end of the spectrum–where it is completely deteriorated–if the duct is completely full of dirt, this can be a very tedious process as far as restoring it. Because first of all, we have to clear it out. Sometimes when a duct is completely full of dirt, we don’t even know what’s going on, because we can’t see anything! So, it almost is like an exploration of where we have to clean for four, five, six hours just to see what’s behind or underneath the dirt.
ST: I’d imagine in some situations you would have to jackhammer?
PRSS: Absolutely! And then we would have to put brand new ducts down. The unique thing about our restoration process is many times we can restore the system without having to rip up the floor, but sometimes if the duct’s completely collapsed or if it’s completely encased in dirt, sometimes we’ll have to open up the floor.
ST: What are some health concerns associated with duct problems?
PRSS: From our experience we’ve had several homes where the tenant may have some sort of allergies. There is one home I can think of off the top of my head where the homeowner couldn’t be in her home for an extended period of time without suffering from respiratory issues. She spent a lot of time coughing, and she had no idea what was going on. We did a duct inspection and we found that she had Sonotubing that was significantly deteriorated. They had a flood a year before. Water with cardboard-it’s going to have some issues. It’s going to start to deteriorate, creating a potential for bacterial growth. We got in there, and even though we didn’t see anything that appeared to be any sort of bacterial growth, we ended up doing a thorough cleaning and then an entire restoration where we coated the entire house, top to bottom, and all of the ducts possible. After completing the entire duct restoration, she’s now living back in the house. She can breathe just fine! This is a situation where she had already replaced the carpet, and had repainted the entire house. She had done everything physically from what she could see. It’s just what she couldn’t see in the ducts that in her own words, was “killing” her.
ST: What does duct restoration cost?
PRSS: It can vary. The size of the system is going to be a huge part. We have a minimum charge of $3,000 and it can go all the way up—depending on the size of the home—to $45,000. It depends on the condition, the size and access. There’s a handful of factors, but I would say on average a typical 2,000 square foot house in the Albuquerque metro area with average deterioration or average-to-significant rusting with no collapses probably would cost between $6,000 and $9,000. However, there’s times we’ll go into a 2,000 square foot home where only half the ducts need restoration. In that case you might not even be at $6,000, but rather $3,000. It just depends.
ST: Tell me about the process of restoring the ducts.
PRSS: With our typical process we start with the duct inspection. After the duct inspection has identified issues–and the client has expressed an interest that they want to get an estimate–we usually can get them an estimate within 24 to 72 hours. After we get the estimate out, and they’ve made the decision to move forward, and once we’ve received a signed proposal on that estimate, we typically can schedule them within two to four weeks. Once they’re scheduled, it’s a two-step process where we go in on day-one. We do a full duct-cleaning, we do all the prep-work needed–whether that’s extra concrete, rebuilding the boots or rebuilding the duct(s) with sheet-metal. Once we’ve prepped the entire system then we apply our coating called “Duct Armor™” to the system. Once the first step has been completed, typically it will take anywhere from 7-14 days to properly cure, depending on weather conditions and airflow. There needs to be airflow moving through the ducts for three days after the first step. Fourteen days later after the first coating has been applied we will come back. We will review the entire system and apply a second coating. The same process happens where we apply a second coating on top of the first coating of Duct Armor™. We want to make sure that any areas that may need extra coating or areas that may have been spotted during the first process be covered. Our goal during the second coating is to make sure the system is completely coated as we were contracted to do. From that period forward, again, another 72 hours of airflow moving over it, and the system is restored. We provide a complimentary follow-up video inspection seven days afterwards to show the client this is the work that has been done. We offer a 15-year warranty that is transferrable and stays with the house.
Caleb sure knows his stuff! Even though The Sugar Team doesn’t have any affiliation with Caleb or Professional Radon and Sewer Scoping Services we chose them to do the duct restoration in our own home. We are happy to report two years later the ducts are in the same excellent condition from the day they were resealed. Thanks Caleb!

